It's time for moldings... and there are a lot of them on an Italian harpsichord.
First comes the molding that lies along the soundboard edges, which will hide any little gaps between the soundboard and case. These moldings can also serve as places to drive the hitch pins, if one chooses. Another possibility is to drive them through the soundboard just in front of the molding.
The moldings are based on the same profile used to make the bridge and nut—a cove and a little groove—so the decor has a holistic sort of feel to it, with recurrences of the same basic designs.
I've started with the tail molding, which is both thicker and higher than the remaining moldings. This will lessen the downward pressure of the strings on the bass end of the bridge. When the hitch pins are driven through this molding, they'll penetrate it and the soundboard and go a little way into the tail liner, which will help secure this piece against the tension of the bass strings.
The molding glued in place:
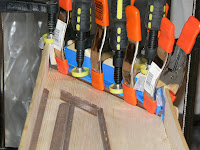
Note, at bottom left, some of the other moldings: same profile but much slimmer. These will cover all the remaining junctions between soundboard and case and will also outline the edges of the wrestplank.


